To gain an understanding of what types of music videos the "general public" liked, I decided to conduct a survey which would allow me to both narrow down my ideas for what type of music video I would like to create and also how I could make it appeal to my target audience and other audience members. From my survey, I gained a nice amount of results from people and mostly those who fit into my target audience. These have allowed me to understand what is desired from music videos, particularly form the current generation(s). Most of the responses I received to my questions were fairly straight forward and as I predicted them to be - 80% of people said they enjoyed watching music videos; 32% (the majority) said they enjoyed the pop genre; 80% of people watched music videos through YouTube. However, in the areas that I was most interested in (the questions shown below) I received responses that gave me a clearer insight into the vast mix of interests that people have in music videos, even though the majority of people who took the survey actually enjoyed the same type of music.
The area which I focused on the most and got the most interesting answers for was the question "what is your current favourite music video (and why)?". I asked this question so that I could watch some of them to see what the people who responded meant and also glean a little inspiration for my own music video.
A lot of people went for music videos which were artistic in the way that they were shot/edited and also ones which were "fun to watch" and "engaging". This has helped me to figure out what I will do for my music video and also, when paired with the focus group which I intend to hold, will enable me to have a greater understanding of how to appeal to my target audience through the music video.
Shot by shot overview: Opens with shutter sliding motion - bright high key lighting. Camera pans up from the blue and white balloons on the floor to the group, the two men wearing animal print shirts and the female (lead singer) wearing very brightly coloured clothes and holding an umbrella. She's in the middle so the main focus is on her, she is the iconography of the band. The words "still into you" flash over the screen while the band remain motionless. As the base line starts, the shot changes to a panning shot (quick) in a bedroom with the lead singer sitting on a bed - which is surrounded by birthday cakes (relating to the lyrics "can't count the years on hand that we've been together") Shots of the cake inter cut quick (in-between the first and second line of the song) with close ups of the singer smiling. High angle shot of her laying on the bed. Quick shots again of her smiling and laying down in-between the lines. Back to her dancing on the bed. 0:30 - long shot of the whole band biking towards the camera in a pastel large manor house. Followed by a close ip of the lead singers leg on the bike. Cuts back to her on the bed dancing and at 0:37 back to the bikes. [Chorus] Cuts to a close up of the lead singer in the fore ground and the other two behind her on the bikes as she sings the pre chorus. 0:46 - shot changes to her singing to the low angle camera as the others ride around in circles behind her - fireworks onto the walls. Shots of all dancing around. 1:17 - shot changes to her walking forward in a horizontal line of ballerinas - long shot pans down. Her dancing with them (more relaxed dancing contrasting professional dancing). Claps in time with the claps in the audio (creating a foley type effect) - mid shot. This cuts to a mid shot and long shot of the group in the boat/balloon room from the beginning of the music video. Then changes back to the ballet room. Begins to cut between the two rooms till it gets to the chorus when it stays in the room with the boat where it shows multiple shots of the band messing around (like in the previous chorus). [Bridge] Goes back to them in the firework projection room rolling on the walls then them in the balloon room (in slow motion). A previously used shot of them on the bikes and then flips to the ballet room. "Some things just" standing against the wall, a close up of the singer (ballet), back to standing, back to ballet. 2:47 - the music slows for the build up to the final chorus. New shots are introduced of them all outside with sparkles and other fireworks going off layered over the top - all in slow motion. As it starts to build it cuts to the ballet room and then cuts back to outside as the fireworks go off behind the band in time with the music/beat. It then makes quick cuts to the firework projection room, then outside, and then once the last line of the song hits, it cuts to the firework room, the boat (the cut is off beat) and outside (repeatedly). As the song ends and fades out, the camera stays outside and pans away from a low angle mid shot of the lead singer to the fireworks in the sky to the above right.
-- The overall feel of the video that has been created is very atmospheric and bubbly/fu. This fits with the new image of the band that they are aiming to create. The inspiration that I have taken from this video is how there is a wide and bright mix of colours that match with the theme and tone of song. Along with a balance between footage played at normal speed and some footage that has been slowed down/in slow motion. The way that the lyrics are matched up with different scenes/shots that amplify the lyrics has also influenced me for how I am going to film and edit my music video.
A shot by shot overview of the music video: As soon as the video starts, there is immediate branding [0:00 - 0:08] of the artist's name followed by the title of the song. Black and white aesthetics, abandoned places with light flares - reflects the "ghost town" idea and abandonment/heartbreak that the lyrics of the song mention. Double exposure of the artist's face for fade in shots and images of the empty places. Soft lighting over his face and the settings until 0:48 when the exposure changes to a more high contrast and dimmer type of lighting. (Chorus) Flashes and jump cuts begin to match up with the beat of the music. The visuals become more of singular dancers (and models) all dancing and being "individual" - such as a gymnast posing against a wall. Changes back to a mid shot of the artist with soft lighting that has a close up of him with more high contrast lighting layered over the top of it. [1:58] The visuals change once again to the artist in a club setting with flashing lights and low key/high contrast lighting. As the song hits the pre chorus, the fast jump cuts of dancers is reintroduced. [2:00 - 2:10] The cuts to the beat change to various shots of the artist - a mid shot low key lighting shot of him in a club with others; with soft high key lighting mid shot walking forward on a diagonal; close up with low key lighting; high angle long shot almost directly above the artist - black background with him in light; soft lighting shot again - mid shot. Shots of the artist are intercut with shots of dancers in low key lighting and images of figures/statues in cloth. (Bridge) A soft lighting high angle mid shot of the artist on the right compositional third, with a male dancer covering the majority of the screen exposed over it - with the child in slow motion. The clips of the artist shot from a high angle (sitting on the floor and standing) are faded in and out - along with the dancer. As the quick beats in the music hit (lasting for 5 beats) there are quick jump cuts of the dancers moving. It then goes back to a long shot of the artist on the left third in the same lighting. The slow motion dancer is brought back in on the jump cut. Before it becomes more rapid and gets intercut with images of the artist in soft light and and the club setting. (Chorus) The beat of the music then comes back in, accompanied by the same style of imagery and editing cuts of the harsh lighting and dancers as the previous "chorus". The motion of the dancers slows as the song goes into its last lines - no jump cuts. It then cuts to shots of the artist yet again. A low key, high contrast close up over the top of a long shot of the artist in soft lighting. -- There is a multi ethnic and variety of genders included in this video through the dancers that are shown. This produces an all inclusive and accepting iconography, reflective of the LGBT+ vibe that the artist creates in his music and "star image". In terms of how I have taken inspiration from this music video, the way in which the whole video is in black and white to reflect the mood of the song has influenced me to try to match the colour schemes that I use in my music video with the tone that the lyrics have taken. In addition, The way that the editing changes to fit the changes in the pace and beat of the song has also inspired me when it comes to editing my video.
This is the finished and final version of the promotional video that I have made for my client's, Mrs Nicola Osborne, Childminding business. Having completed what I set out to do I feel as though I was able to produce a fairly decent video even though there are some issues which, given a longer period of time or the chance to redo the video, I would improve. The use of matching the voice over to what was being shown on the screen at certain parts of the video, I feel, has given it a some what professional appeal as the clips illustrate what is being mentioned. I also think that the way in which the overall video is constructed (it's structure) work well in showcasing the variety of activities and care that each of the children at my client's facility receive. In terms of whether or not I was able to succeed in getting my client's desire message across and managing to create I video that fits the brief that me and my client arranged, I feel as though I did manage to fulfil the task and create a product that promotes my client in a positive and correct way. I ensured to include some direct quotes from my client - namely their business ideal, details and services that they offered - so that the video itself was fairly straight forward and got the point across (it stated what the children will receive, how potential customers can contact the owner of the business and the facilities/activities that take place). I do feel as though when it came to writing the script and adding the additional information over the top of the footage, I could have included more about the hours that my client looks after children from and the flexibility with which she can work with the parents and around their shifts at work. I think that this could have attracted more customers as it would show that she (my client) is willing to work with them to make it a great deal easier and more convenient for them whilst also providing good care of their child/children. When it came to filming, I tried to take a wide range of shots so that during the production and editing stage of making the promotional video I would be able to draw on specific and a variety of aspect about my client's business. As I was creating and shooting this promotional video, I tried to create a very hands on while at the same time very caring feel to the video. This is the reason why a great majority of the shot in the video contain hands and different learning activities - such as drawing, recognising numbers and the carers/adults working at the childminding service holding hands with the children to ensure that they are safe. From the research that I did, I drew a great deal of inspiration and understanding of how to make a successful promotional video - specifically taking more reflection from the Childcare UK company promotional video as it directly linked to the type of video that my client wanted. In my research, I found that the Childcare UK promotional video had a mother's voice, high key lighting, bright colours and a great deal of shots of different children smiling. I believe that this research does show through in my final video and, as a result, shows the influence that I have taken.
In terms of health and safety, for this promotional video I had to take extra care with what I was doing as there were very young children on the premises at all times while I was filming. I tried to minimise the amount of clutter or camera equipment that I took with me so that the risk of damage to equipment and harm caused to any of the children under my client's supervision at the time was lessened.
Prior to filming anything, I also ensured that I had full clearance and understanding from the parents of all of the smaller children so that I didn't run the risk of unsetting them. In doing this, I was also able to survey the surroundings and locations that I would be filming in so that I could work out what shots I would do and how /i could go about shooting without harming any of the kids.
After creating and finishing the first draft of my promotional video, I emailed it to my client to ensure that I was taking the video in the right/preferred direction of my client. In this first draft I contained a note over the top of the video to indicate where the voice over begins and ends - sending her a copy of the script for her to approve in addition to the video itself. I received feedback from Mrs Osborne saying that she was pleased with how it looked so far.
In the recent meeting that I had with my client, on the 3rd of March, along with discussing the distribution of release forms I presented a few different royalty free musical scores that I feel gave off the child-friendly and casual vibe that my client is looking for to be the backing music to the promotional video. After showing her each of the pieces, we agreed that the Italian Afternoon tune - which I discovered on the royalty free YouTube library - was the most appropriate fitting to the specifications discussed in our first meeting. When it came to the release forms, I found some bases for parental approved ones, via an online source that my place of study provides, and edited them to accommodate the fact that the children who would appear in the video would not be able to write their own names and all rights and permission would have to be signed off by the parent or guardian of the child. Below I have included an example of one of the edited release forms which I have shown to my client for their approval and since then distributed amongst the parents/guardians of each of the children under the care of my client in the hopes of them soon being returned so that I can begin filming for the promotional video.
- Bright lighting, airy and clean feeling - Kids are all smiling/happy - Pleasant female voice (motherly) - Voice over - Playful music - Keeps the logo/website up throughout the entire video (brand identity) - Tag line and available places at the end 00:30 long
Jasmine Lee Photography:
- The voice over is done by the person who's company it is - Talking about how photography has inspired and developed her (what she's learnt) - Her personal attachment to it - Her sitting in her house talking about it - Want she wants and her exact job - Repeats "I'm Jasmine Lee and I'm a wedding photographer" (repetition to enable you to remember it) - Shows her doing what she does - More relaxed background music 02:27 long Emirates:
- Music linked with Dubai and it's culture - No voice over, all just written information shown on screen - Shows the events in Dubai, the culture, the plane service, the duty free area of airports and check in, destinations they fly to/from - Logo at the end (nothing else) - Range of people all smiling - Kind and polite staff 03:38 long List in Google Maps:
- Upbeat music - First introduction is the product in use - Ends with the address of the site, app icon and name - Bright colours - Camera moves to focus on the aspects of the screen that the eye should focus on (also where the users eyes would follow to when using the app) 00:25 long
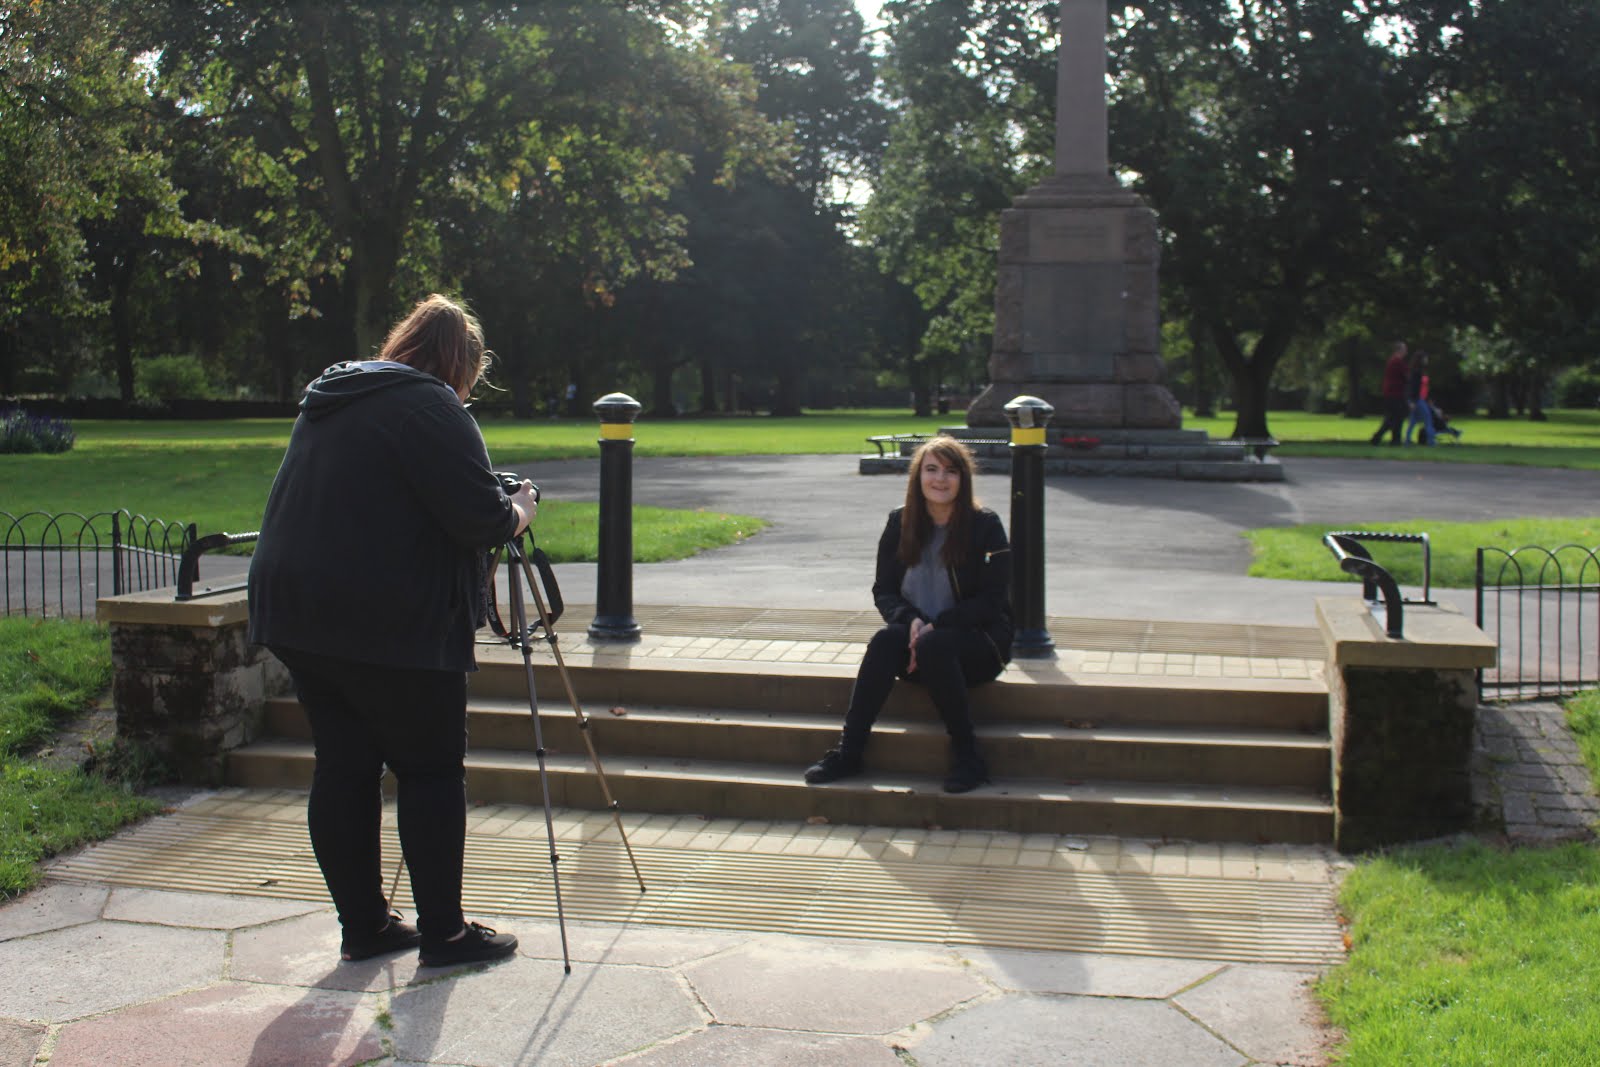
In the studio:I was adamant in to make sure that everyone in the studio was safe when I conducted my shoot in the studio. I was especially careful as to not leave various cables and wires around on the floor as a hazard for people to trip over and hurt themselves. When moving the lights around for the various set ups that I needed to demonstrate (Rembrandt, butterfly, etc), I made sure that the lights didn't get too hot or overheat - ensuring that no one in my group burnt themselves. Outside: When I was out shooting in Birmingham in in the Nuneaton area, I made sure that all of the camera equipment was supervised so that non of the general public could harm themselves by falling over or bashing into the tripods (etc). The image bellow is of behind the scenes while me and a small group were out shooting Nuneaton.
This video shows the different types of lighting that can be used (except for High-key and low-key which have included photos of underneath). I found that it was fairly easy to achieve the different uses of high-key lighting and low-key lighting because altering the ISO camera setting made the example of the lighting style a great deal more evident in the video. Using the photography studio I was able to create most of the lighting techniques as the amount of unwanted light entering the image was greatly decreased.
This video consists of a few of the lighting set ups that I used that are of a more experimental appearance, showing a further exploration of lighting techniques and the effect that they have on the video.
This video presents the different types camera shot, including: establishing shot, mid shot and extreme close up. Using different shot types accompanied with aperture can create a range of different emotions for the audience to decode - such as long shot with a shallow depth of field can allow the audience to gain the reading that the subject/character in the scene feels isolated where as an extreme close up with a low aperture could show that the character is scared. There are a few shot types that I missed out due to loosing some of the footage (establishing shot and extreme close up), however, the clips that I do have in the view are very good in the way that they are examples of the shot types. The high angle shot is a very nice example of the type of composition that can be used along with the shot type (as well as being a good example of the technique).
This is my first draft/rough cut of my new wave short film, including no narrative or sound. I chose to make this so that I could work out the clips that I wanted to use in my film and the different types of editing techniques I will use (mainly the jump cuts).
I chose to label and organise each of my clips of footage so that it was easy for me to sort through them and pick out the best ones/the ones which demonstrated different and certain shot types. Choosing to name the footage like this meant that it was easy to find the shots/clips that I wanted when I was editing and putting together my short new wave film. In addition to the names, my decision to view the shots like a list meant that I could also look at the settings of each piece of footage and the duration - meaning that it was easier to work out where to cut each clip.
As well as renaming all of my footage, I decided to label each of them with a different colour/groups of colour depending on what shot type it was. This means that I can see which clips are the same type of shot rather than what the shot contains/the subject of it.
To investigate and practice using shutter speed, I chose to shoot three videos at different shutter speeds (1/30, 1/50 and 1/60). When it came to shooting the videos, however, I decided that it would be more effective to show a very high shutter speed as it would be a clearer exploration of the effect of shutter speed on the quality and visuals of the video. This video is shot at shutter speed 1/30, meaning that there is a slight motion blur and the aperture I used had o be very low so as to not over expose it.
To achieve this effect, I chose to use the following camera settings: ISO 200, shutter speed 1/30, 25fps, and aperture 5.8ff. When shooting at such a slow shutter speed, I found that it was difficult to make out the detail of the water and the over look of the video was quite dull.
This scene shot highlights what I mean and shows that the slow shutter speed increases the amount of motion blur and makes the water appear as though it is a smooth continuous stream. I do feel that my choice to shoot a garden hose/water was good though as it means that the full effect of shutter speed on film is evident.
For this video, I shot at shutter speed 1/50 so that the visual appearance of the water would be closer to that which humans see with there naked eye. The shutter speed should always be double the number of the frame rate, for example: if you're shooting at a frame rate of 25fps you should shoot with a shutter speed of 1/50. This means that although the appearance of the water is still smooth, it is what people see with their natural eye - this is also the type of frame rate to shutter speed ratio that most directors and film makers use.
To achieve this effect, I used the following settings: ISO 200, shutter speed 1/50, 25fps, and aperture 7. Because I was shooting at a higher shutter speed, I had to change the aperture to allow less light into the camera and prevent it getting over exposed, however, this meant that I had to refocus the camera.
This scene shot shows that the higher the shutter speed, the less motion blur there is. It also shows the trouble I had when it came to refocusing the camera, however, that could also just be a little amount of motion blur from the garden hose moving as it was hand held.
This final video shows the effect of the shutter speed on the footage at both 1/100 and 1/400. The stream of water presented at this shutter speed shows that there is no visible continuous stream and instead the individual droplets of water and details are clearer.
To achieve these effects, I first set my camera to: ISO 200, shutter speed 1/100, 25fps, and aperture 10; and then to: ISO 200, shutter speed 1/400, 25fps, and aperture 10. As these two shutter speed are quite high, the details are very clear but the exposure also made the lighting a great deal crisper, meaning that it looks more like a photograph or unreal that the other two videos do. Because of this unnatural looking appearance that shooting at such a high shutter speed gives, directors and film makers usually elect not to use it.
These two screen shots show how much detail is visible at high shutter speeds - because there is such a high shutter speed there is very little motion blur. I found that it was a great deal more difficult to focus the camera when using these high shutter speeds because I had to focus on the individual droplets rather than on a constant stream like with the slower shutter speeds.
These are two short videos showing my exploration of ISO and its affect on the footage/footage quality. For these videos, I chose to use ISO 100 to shoot outside and ISO 1600 to shoot inside. The difference in quality that ISO makes is very evident in these videos, the first video (ISO 100) being a very smooth image although a little dark, and the second video (ISO 1600) is a great deal grainier although the footage is brighter. I feel as though these videos are really effective when it comes to showing the effect that ISO can have on the quality of footage. To investigate the effect of ISO on video quality, I chose to set my camera to 24fps, shutter speed 1/50, and an aperture of 5.6ff. As I wanted to explore the full effect of ISO, I decided to keep the exposure as it came out. While shooting this I had some trouble as it was raining and the camera lens kept getting clouded by water landing on it.
This is a short video I made to practice the technique of 'pull focus', this is when the focal point of the frame is changed by pulling the focus from one part of the image to another. Pull focus can be used to great effect when conveying to the audience a different point of interest in the scene or where they should focus. To achieve this effect, I used to following camera settings: 24fps, 1/50 shutter speed, 5.6ff aperture. As I wanted to maintain some quality in the video capture, I had to keep changing the ISO to try to gain the correct exposure. Although I managed to try out and practice this technique, I experienced a great deal of problems due to my hands shaking and there not being a tripod for me to use - this lead to there being some footage that I was unable to use. In addition, I had some instances of footage where the exposure is wrong and the clips have come out too dark/under exposed (this is shown in the coat hangers clip included in the video).